Jeff's Guide to Naturist Photography
Photography is one of the most powerful ways that we as naturists can express ourselves, share our experiences, and show people what naturism is all about. It is also an area that can be fraught for a lot of naturists, worrying that our pictures might be misinterpreted. For people who haven’t studied the subject, photography can seem as simple as pointing the camera at the subject, and pressing a button. But there are so many decisions that we make, often unconsciously, that determine both the quality of the photo, and more importantly, what the photo says to the viewer. Here I would like to share some tips I have picked up from my experience and studies, to help the naturist community to take photos that not only look great, but also show what naturism is, and avoid giving viewers the wrong impression.
This is not meant to be “thou shalt do things my way.” I’m not a professional photographer, photography is an art, and you are the artist. By all means, take your photos however you want. But for those who want to improve their photography, but don't know how to go about it, I hope this guide can be a good foundation upon which to build your own style.
The most important premise for photographing in an artistic way is to think about the photo you are taking. What are the feelings and ideas that you want your photo to evoke, and how do you avoid your photo being misinterpreted? I’ll go more into the details of what you need to think about in each of the following points.
Before getting into the creative decisions, there are some basic technical things to do to make sure you get the best photos possible.
This is not meant to be “thou shalt do things my way.” I’m not a professional photographer, photography is an art, and you are the artist. By all means, take your photos however you want. But for those who want to improve their photography, but don't know how to go about it, I hope this guide can be a good foundation upon which to build your own style.
 |
Photography is more than just a way of recording events. It is an art form that can move, and inspire people - including opening minds about the beauty of naturism. |
1. Think Before You Shoot
2. Technical Considerations
Before getting into the creative decisions, there are some basic technical things to do to make sure you get the best photos possible.
- Have a clean lens. Phone cameras are almost always dirty, which leads to blurry or washed out photos. Keep a lens cloth handy.
- Use a tripod/selfie stick if you don’t have someone else to take the photo. This gets to point #1, about thinking about how you take your shot. If you don’t have a tripod, you’ll have to rest your phone wherever there’s a convenient surface. That takes most of the decision making out of your hands. If you have a tripod, you have a lot more freedom in choosing where to place the camera, where it is facing, and what angle it sits at. You can get very cheap phone tripod/selfie stick combos, and the bonus is they come with a bluetooth remote, which is much easier to work with than a timer.
- Use auto mode. Professional photographers sometimes manually set shutter speeds, aperture width etc. but unless you know what you’re doing, you’re probably going to get the best photo using auto mode.
- Use HDR mode if your camera has it. Camera phones use very small sensors, that can’t capture all the detail in bright and dark areas in the same exposure. HDR captures multiple exposures using different shutter speeds, then combines them into one picture. This allows it to capture details in the dark areas using a longer exposure, and details in the bright areas using a shorter exposure. Sometimes this can result in too little contrast between the light and shadows, but you can always increase the contrast in post. However you can't recover detail in overblown shadows and highlights (Unless you have an expensive camera that can shoot in raw format, but I'm going to assume most people don't). The downside to HDR is that if there’s too much movement between exposures, they won't match up, and you'll get artifacts, so you’ll want to turn it off if you’re taking an action shot in low lighting.
 |
| The same , unedited photo taken without HDR (left) and with HDR (right). Notice how the HDR photo captures more detail and color in the bright and dark areas of the scene. |
3. Camera Positioning
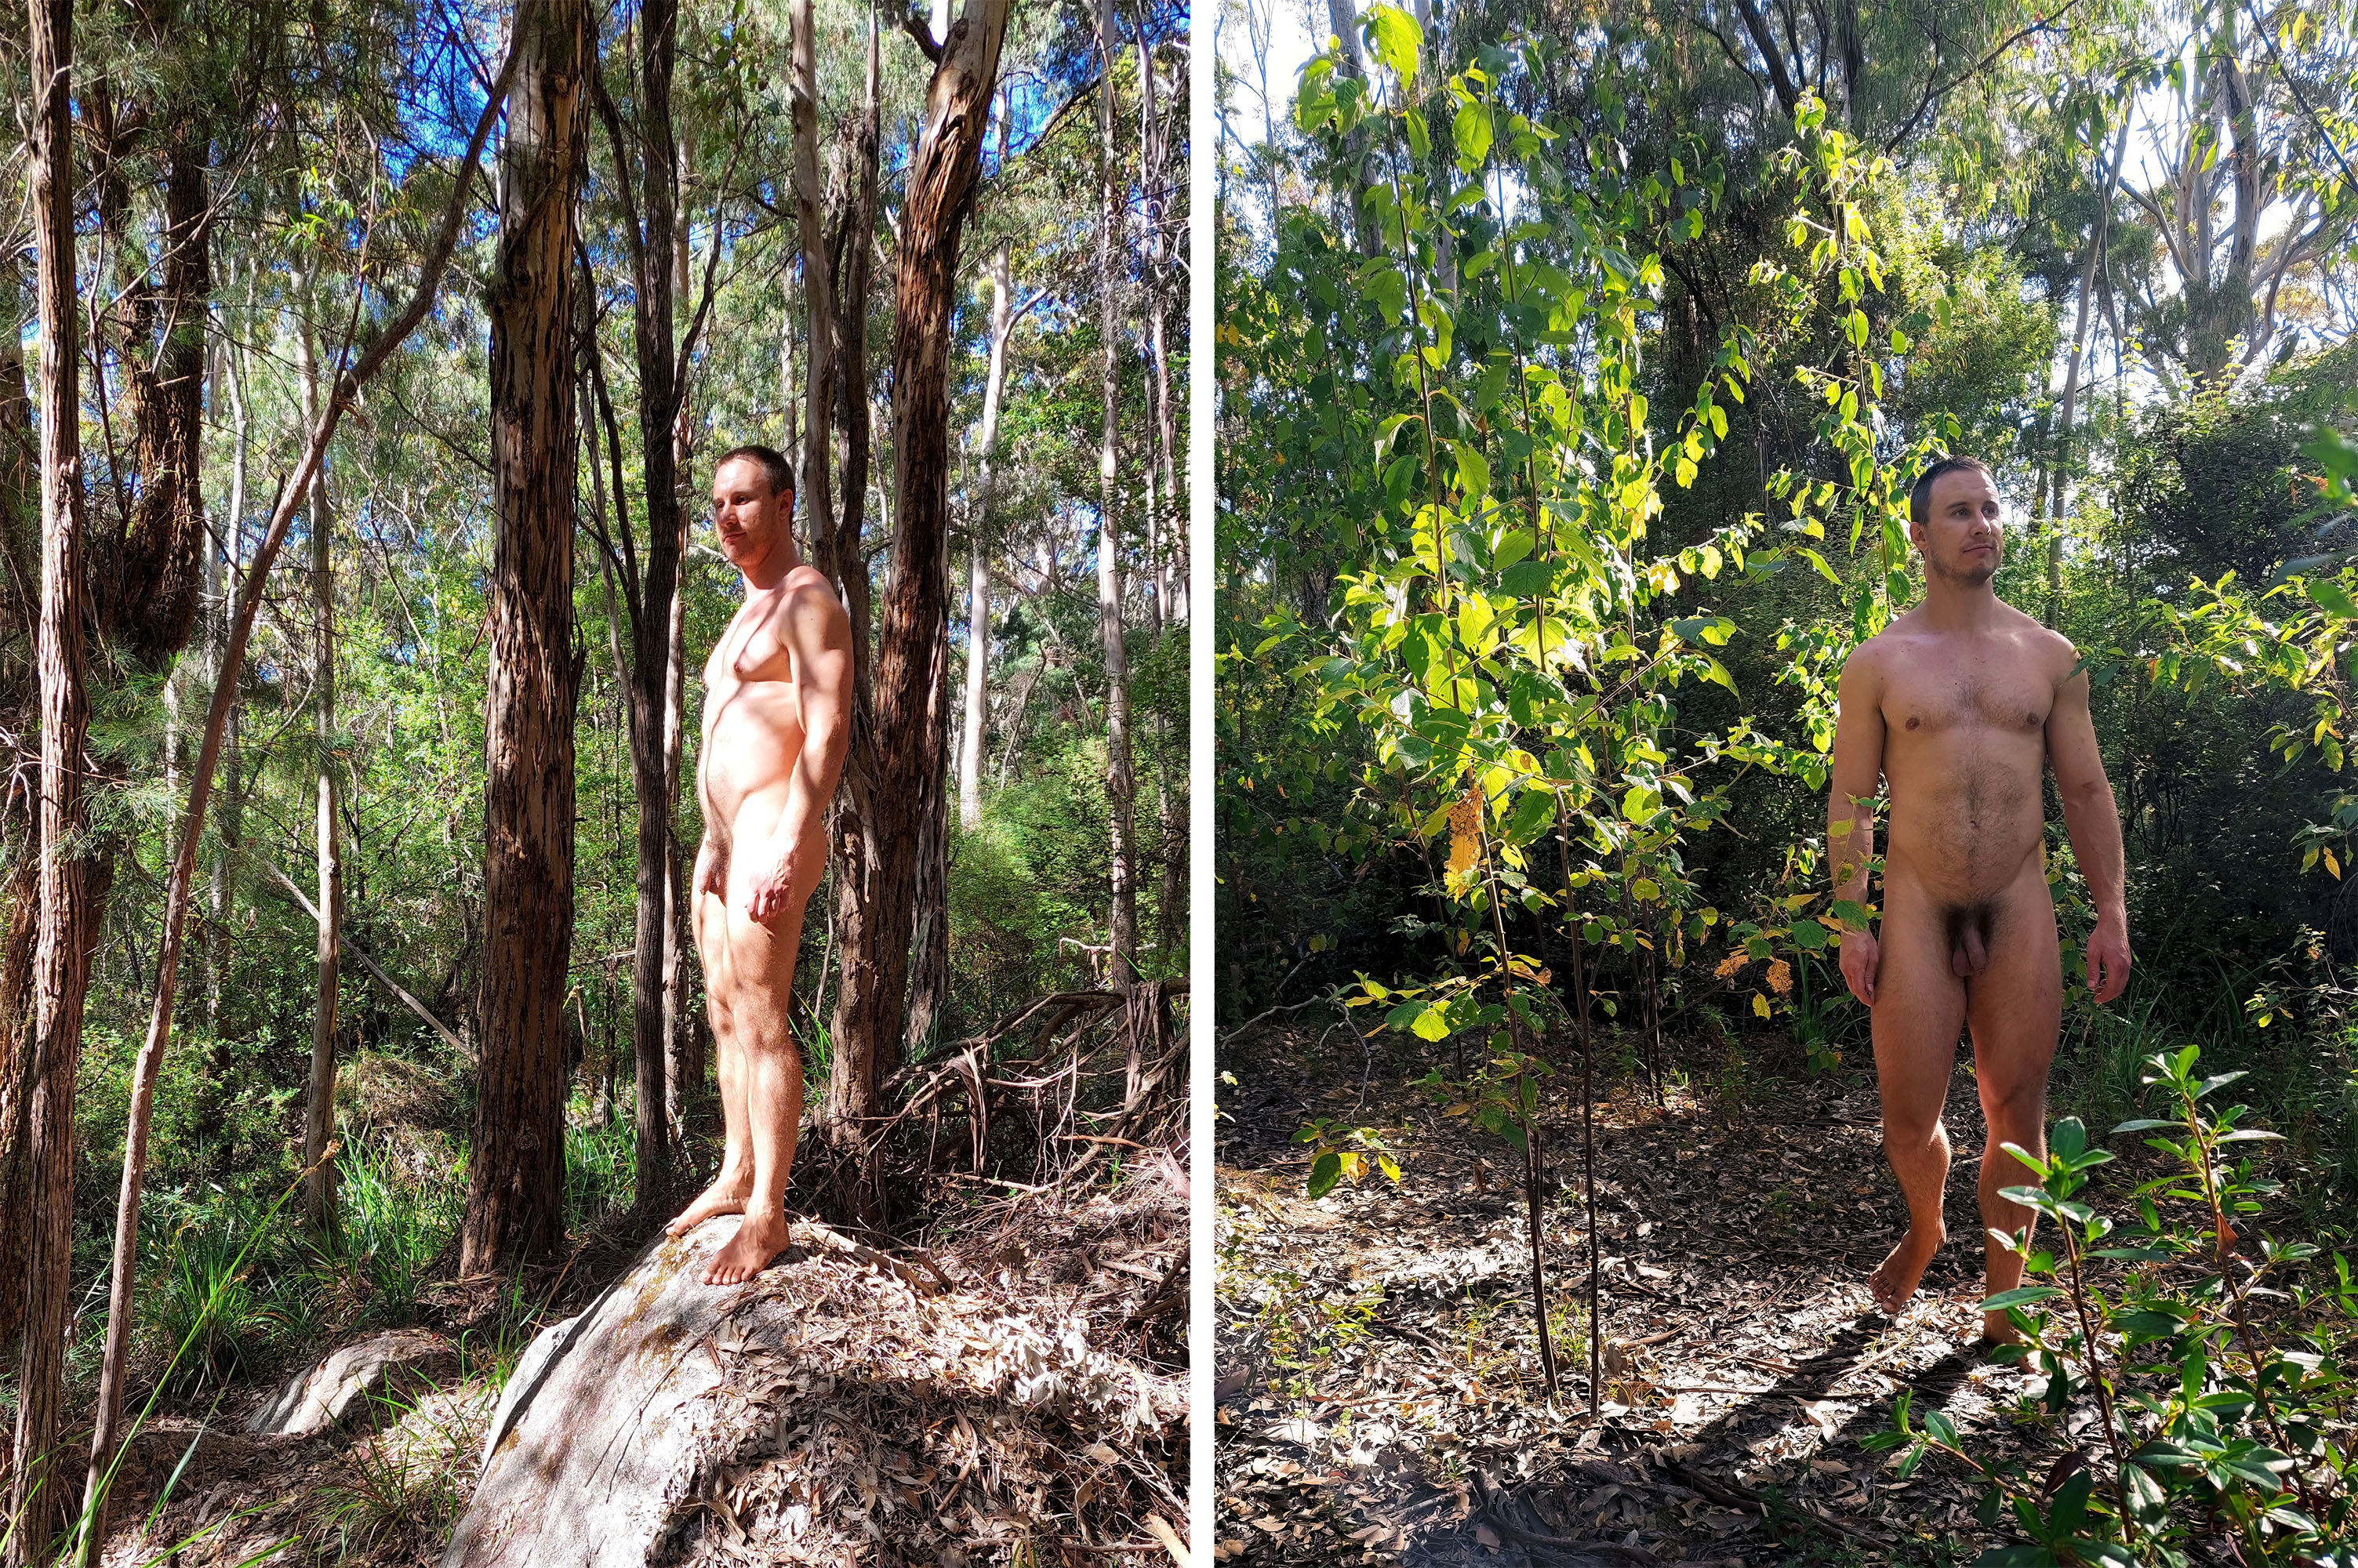
- Give yourself some breathing room. If your body is in the centre of the frame, with little space around it, the impression the photo will give is “look at me.” Move the camera back a bit, and position yourself a little off centre, and the photo becomes less about your body, and more about the joy of being naked in the beautiful place you have chosen for your photo.
 |
In the picture on the left, there is a balance between the subject and the environment. The photo on the right looks to be more about displaying the subject's body. |
- Remember, you can always crop in if you’ve taken the photo a bit too far back, but you can’t crop out after the fact, so err on the side of including more background when taking the photo.
- Think about perspective distortion. This is where things closer to the camera look more prominent. The worst examples you see of this is where someone sits on a bed or couch, and puts the camera looking up from between their legs, and their penis ends up taking up half of the photo 😳. Sometimes we don’t have much option for the height of the camera, because phone tripods aren’t particularly long, and there might not be any higher surface to sit them on. This is where it’s important to have the camera at enough distance to reduce the amount of distortion.
 |
Having the camera a good distance from the subject eliminates perspective distortion - even if the camera has to be at genital level 😇 |
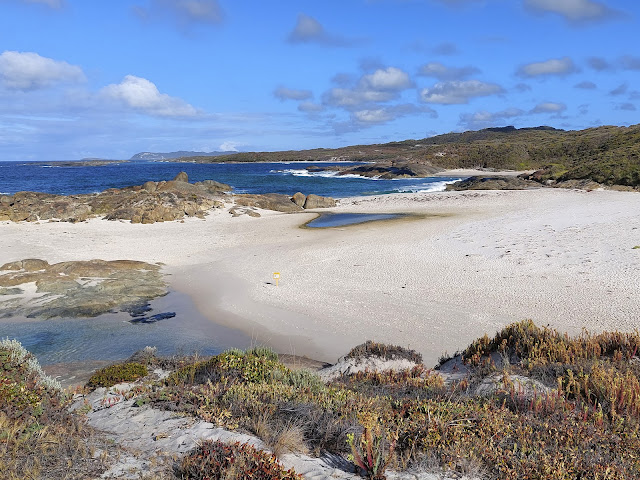
- Angle the camera to best capture the surroundings. If you’re on top of a mountain, you’ll want it looking down over the countryside below. If you’re next to a big tree, you might want to put the camera lower, looking up to show the height of the tree. If you’re on flat ground, you’ll probably want the camera more level, so you get a good balance of the ground and the sky in the photo. A good rule of thumb is to think “How would I capture this if it was just a landscape photo?” And then put yourself in the photo, rather than thinking of it only as a picture of yourself.
 |
The downward-facing camera angle was chosen to capture the scenery below, whilst still including a balance of sky and foreground rocks. The picture works as a landscape photo, even without the subject. |
4. Lighting
- If it’s a bright, sunny day, the biggest problem is harsh shadow and light. Even with HDR mode, we can still get overblown highlights and dark shadows. In real life, our brains deal with these better than in a photo, so what looks like an unobtrusive shadow on your body from a nearby object, a part of your own body, or even the camera itself, can look a lot harsher and more distracting in a photo.
- The best way to deal with this is to orient the photo so that the subject is back or side lit. You avoid the harsh shadows, and you get a nice halo effect on the side of the body. You generally don’t want the sun actually in the photo, so if the sun’s low, go for more side lit rather than back lit. The main pitfalls with back lighting are lens flares, light haze, and an underexposed subject, so make sure your lens is clean, and if possible, place the camera so the lens is in shade, and use HDR mode to better capture the dim areas of the image.
 |
| Left: Front lit photo in bright sunlight. The highlights are blown out, and the shadows from the overhanging trees look bad. Right: Back lit photo from same day. The body is more softly lit, you get a nice bright outline effect on the side of the face and lower legs, and the sunlight through the translucent foliage looks a lot nicer. |
- If there’s more diffuse light, such as on a cloudy day, it tends to look better if you have the subject front-lit.
- If it’s a partly cloudy day, and you have a bit of patience, wait until the sun is just coming out from behind clouds, just as you’re starting to see faint cast shadows. You’ll get really dramatic lighting, without the harsh shadows of full sun.
 |
With the sun behind thin cloud, you get some nice contrast between the shadows and highlights, without it being overly harsh. Notice that you can see cast shadows on the subject's body, but they aren't dark enough to ruin the visual flow of the body. |
5. Posing
- Think about gaze. Looking at the camera gives a more casual photo, whereas looking off camera looks a bit more artsy and candid. If you can’t decide which you want to go for, take some of both, and then pick which one you think works best.
- Don’t forget facial expression. When we’re by ourselves, we tend to have “resting bitch face.” When we’re with others, we naturally show our emotions on our face. So if you’re doing self photography, imagine your friend is taking the photo, and your facial expression will reflect the emotions you’re actually feeling.
 |
| Left: The resting bitch face. I wasn't unhappy, but because I was alone, my facial expression was neutral. Right: The photo has a much nicer vibe, because of the emotion in the facial expression. |
- Use action. If you’re doing something, look like you’re doing it. You can use burst photos to capture yourself in motion if the lighting is really good, and then pick the best one. If the lighting conditions aren’t as good, you can end up with motion blur, so you might just have to hold a still pose as if you were in action.
- Let the environment inform your pose. If you’re next to a tree, rest a hand on it. If there’s a rock at step height, put one foot on it. If there’s a fallen log, stand as if you’re balancing on it. This is a good way to get varied poses that look natural for the location.
 |
Something as simple as stepping over a fallen branch creates a natural pose, and connects the subject to the location. Look for objects in your environment that you can interact with to create pose. |
- Take multiple photos, and choose the best one. Make slight adjustments to your pose, gaze, facial expression, etc. When taking photos of yourself, you can’t see exactly how it looks as you’re taking the photo. You might think you’re doing a cool pose, but it turns out looking awkward. If you take several slightly different pictures, you can pick the one that you think best captures what you’re trying to convey.
- Think about which way to face. Some naturists don’t want to show their face, which is understandable. Photos taken from the back look a lot more artistic than photos with your face cropped or blurred.
- If you don’t mind your face being recognisable, the best way to choose is simply to think, how would I face in this photo if I wasn’t naked. Usually that means you’re facing toward the camera, although sometimes it might look more artistic facing away, for example if you’re looking out over a beautiful vista.
 |
Facing away from the camera can also create beautiful, artistic shots. Just remember, you don't have facial expression, so the pose, composition and location have to do more heavy lifting |
6. Editing
- Firstly, editing a photo isn’t cheating, or deceptive, if you’re just doing basic lighting edits. Cameras use an algorithm to process electromagnetic radiation that falls on their sensor into the best approximation they can make of what the scene looked like. But they aren’t perfect, and the algorithm they use isn’t necessarily tuned to every set of conditions you’ll encounter. So there’s nothing wrong with making a few tweaks, to get the image to closer match your own vision.
- Straighten horizons. Particularly if you have a flat horizon, like an ocean. If the camera wasn’t held level, the horizon will be diagonal. Rotating the image to get a level horizon makes it look a lot more professional.
- Crop. You may have too much blank sky at the top of the photo, or too much ground and not enough sky. You may have placed yourself too close to the middle, or edge of the photo. This is especially true with self photography, since you can’t see exactly what you’re capturing when you take the photo. By cropping, you can get the composition closer to how you want. Hopefully you put the camera far enough away that you’ve got a bit of excess picture to play with. Just be wary of cropping in too close, because you might not have enough resolution for a clear image.
- Adjust light levels. This is completely optional, and mostly based on your own artistic tastes. Some people like photos that pop with a lot of contrast, others like a more muted effect. Some like the moodiness of deep shadows, others like more brightness. I won’t go into too much detail with this, since it’s not specific to nudist photography. You can easily find tutorials online about this.
- Spot edits. This needs to be done with care, because this is where you get into the ethics of deception, especially when it comes to the effect of edited photos on perceptions of body image. My policy is that the only spot edits I’ll use on my body are a) removing any flies or bits of dirt that were on me, if they distract from the photo, and b) spot editing lighting, if I am under or overexposed, but the background is correctly exposed, such that doing those lighting edits on the image as a whole would ruin the background.
- Spot edits on the environment are less ethically concerning. If you want to remove an ugly signpost or piece of rubbish in the background of an otherwise beautiful photo, go ahead.
- With all edits, use restraint. It can be easy to overdo it and make an image that looks fake.
 |
Before and after editing. I straightened the horizon, cropped out the excess blank sky and rock, increased the exposure, removed the excessive green tint, and did a spot saturation edit to bring out the rainbow, without oversaturating the rest of the photo. |
7. Don’t Get Too Caught Up
- There’s a lot to think about, and you’re not going to be able to get everything perfect in every photo. I certainly don’t.
- Sometimes you’ll have an artistic reason for wanting to do things differently, and that’s fine. The important thing is that you’re thinking about how you take your photos, instead of just pointing and shooting, without considering how you might be able to make the photo better.
- You’ll never please everyone. I’ve been told that my photos don’t convey natuism properly because my genitals are too visible. I had to explain to the person that my genitals are in a very prominent position on my body, and that I would have to go out of my way to compose my photos to have them covered up. People often tell female nudists that they are sexualising nudity if they don’t keep their legs together, even though they would consider the same pose perfectly acceptable with clothes, or if a naked man did it. People will complain that you’re just trying to show off your body if they don’t deem your photo interesting enough (if you’re drinking coffee indoors usually). The point is, there’ll always be complainers, no matter how well your photos portray naturism. Don’t listen to them. Have fun, make art, and show the world what being a naturist means to you.
Great direction for naturist photography! I have admired your nudist photography for some time.
ReplyDeleteI would like to add to point #2 for technical considerations.
Most lenses, particularly on cameras, have lens distortion at the periphery such that the image is stretched or elongated away from the center. This can be compensated by capturing the image in a wider (or more distant) frame then cropping the edges out and retaining the majority of the center. Keep up the great work promoting naturism!